Contract
Hepton use EVM for contract execution.See Solidity for detail.
Remix
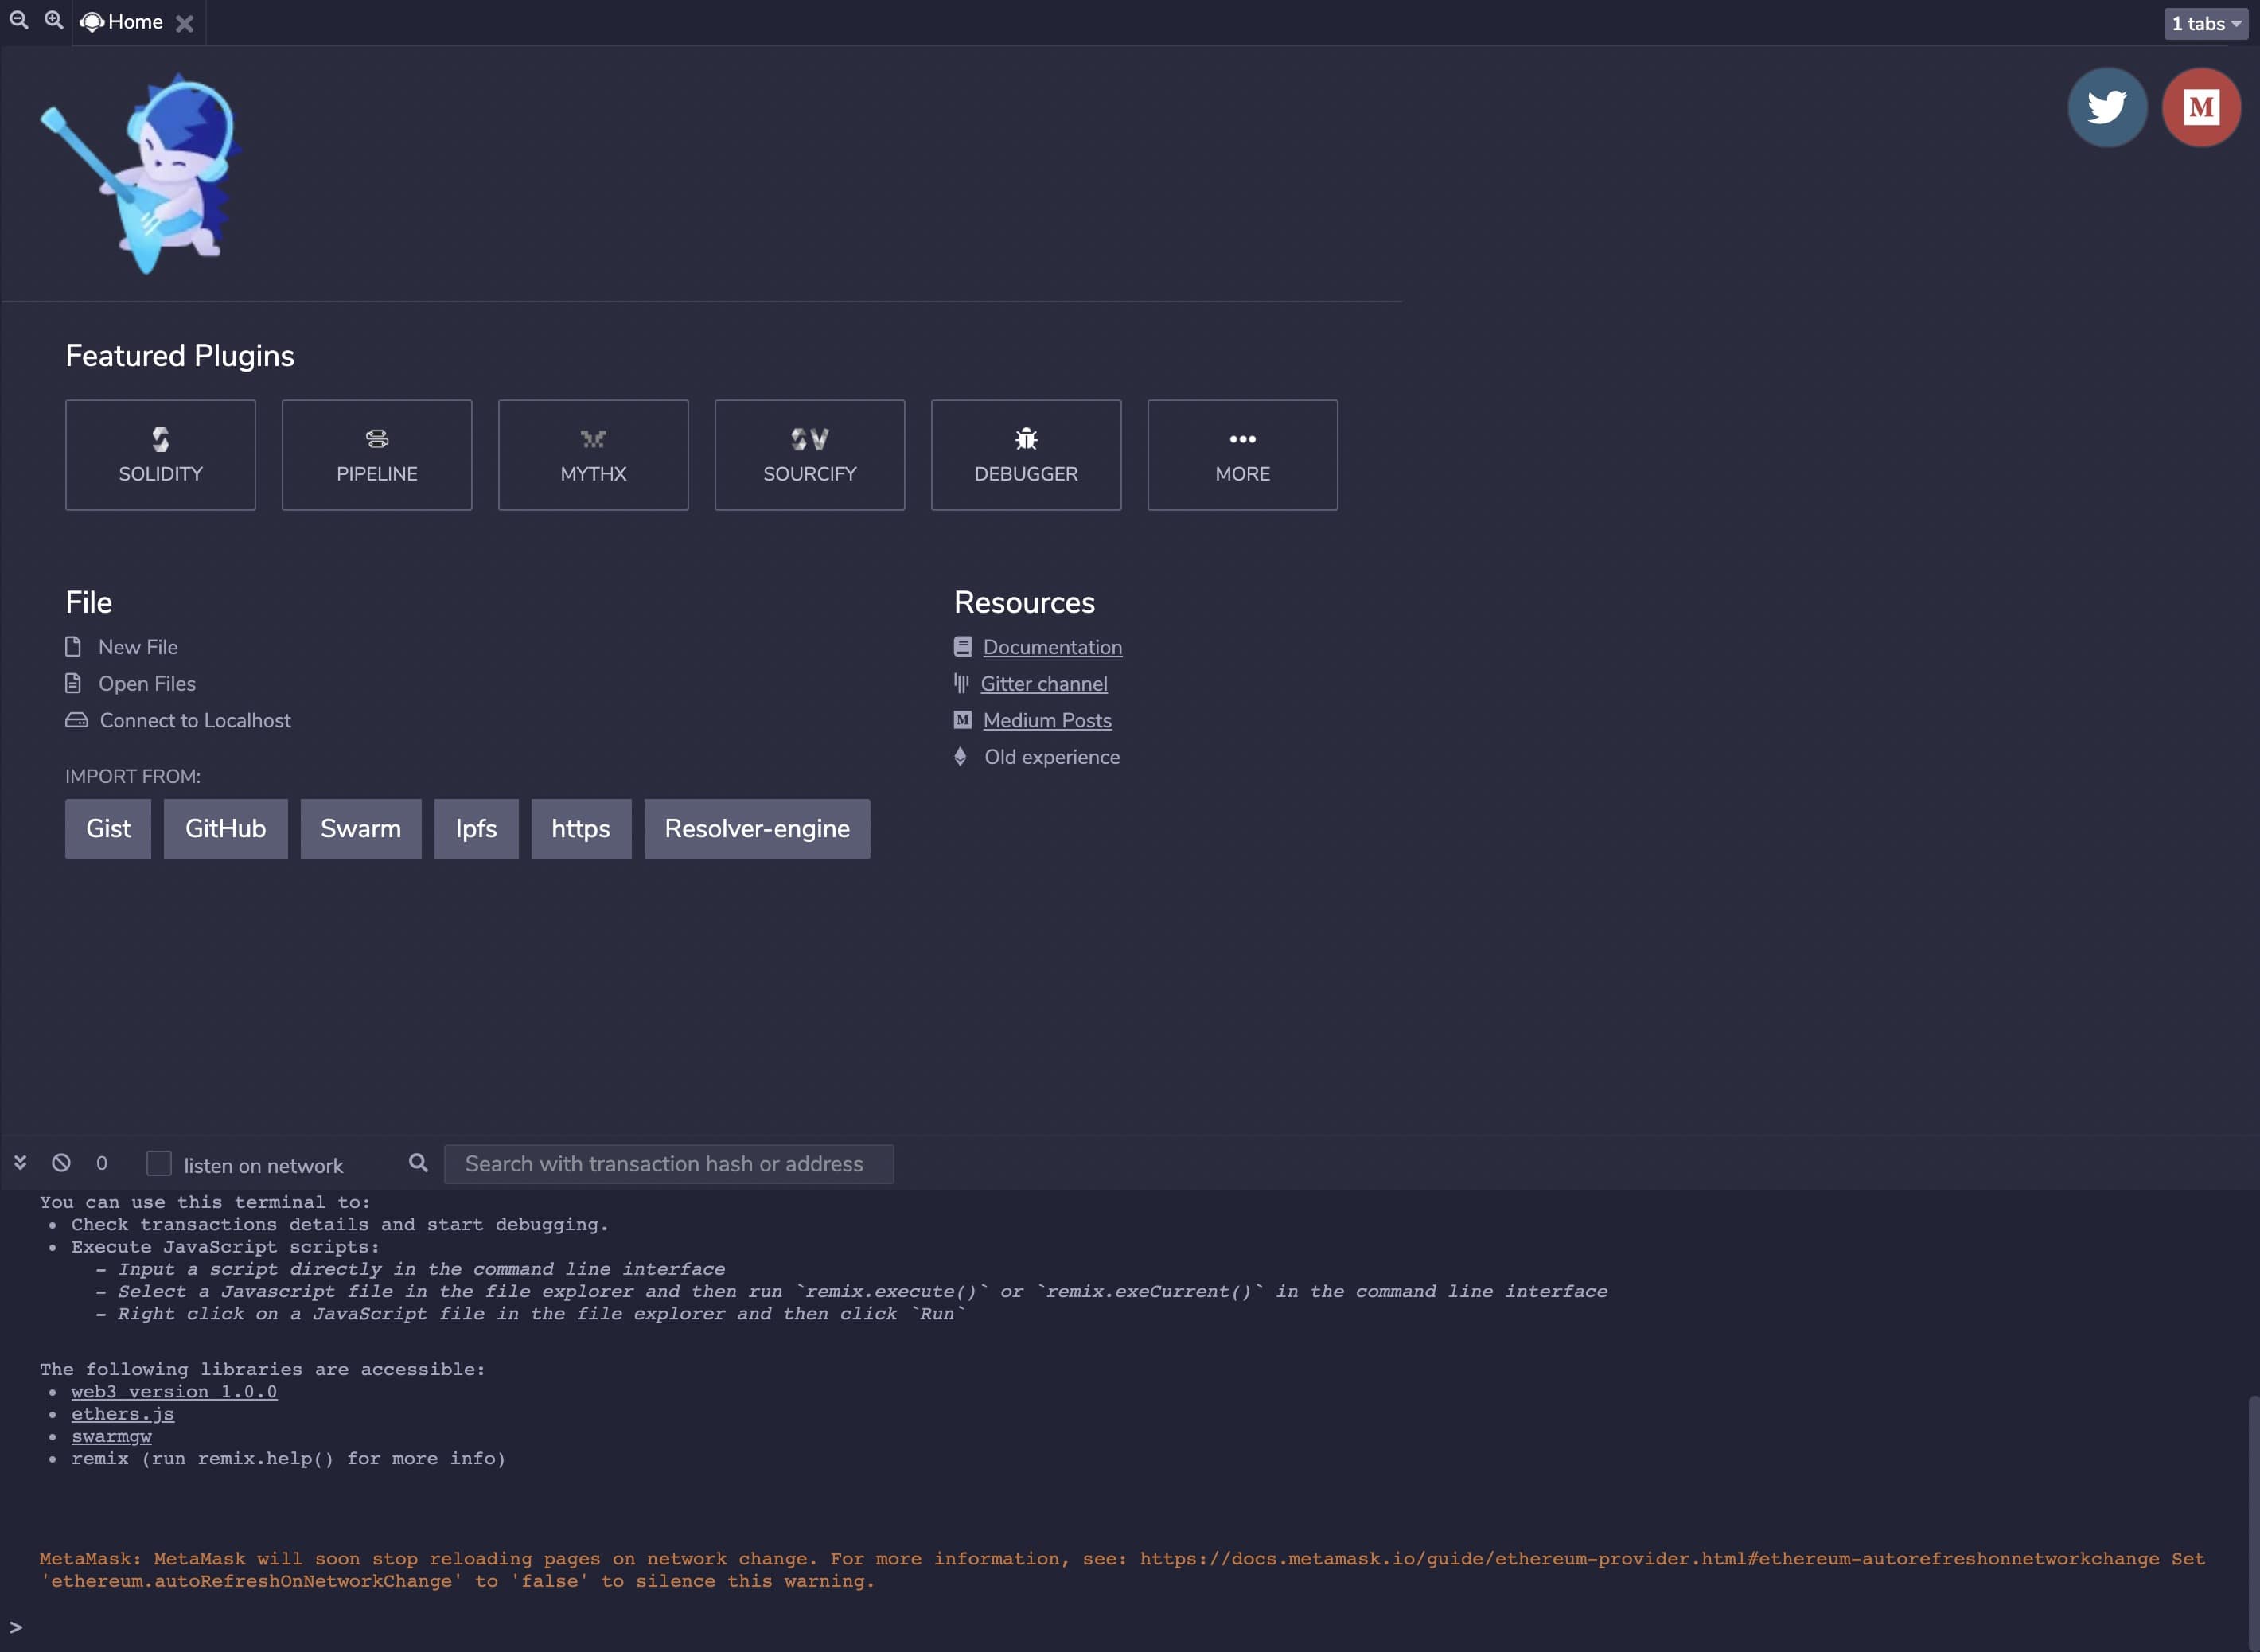
Remix IDE is an open source web and desktop application. It fosters a fast development cycle and has a rich set of plugins with intuitive GUIs. Remix is used for the entire journey of contract development as well as being a playground for learning and teaching contract development.

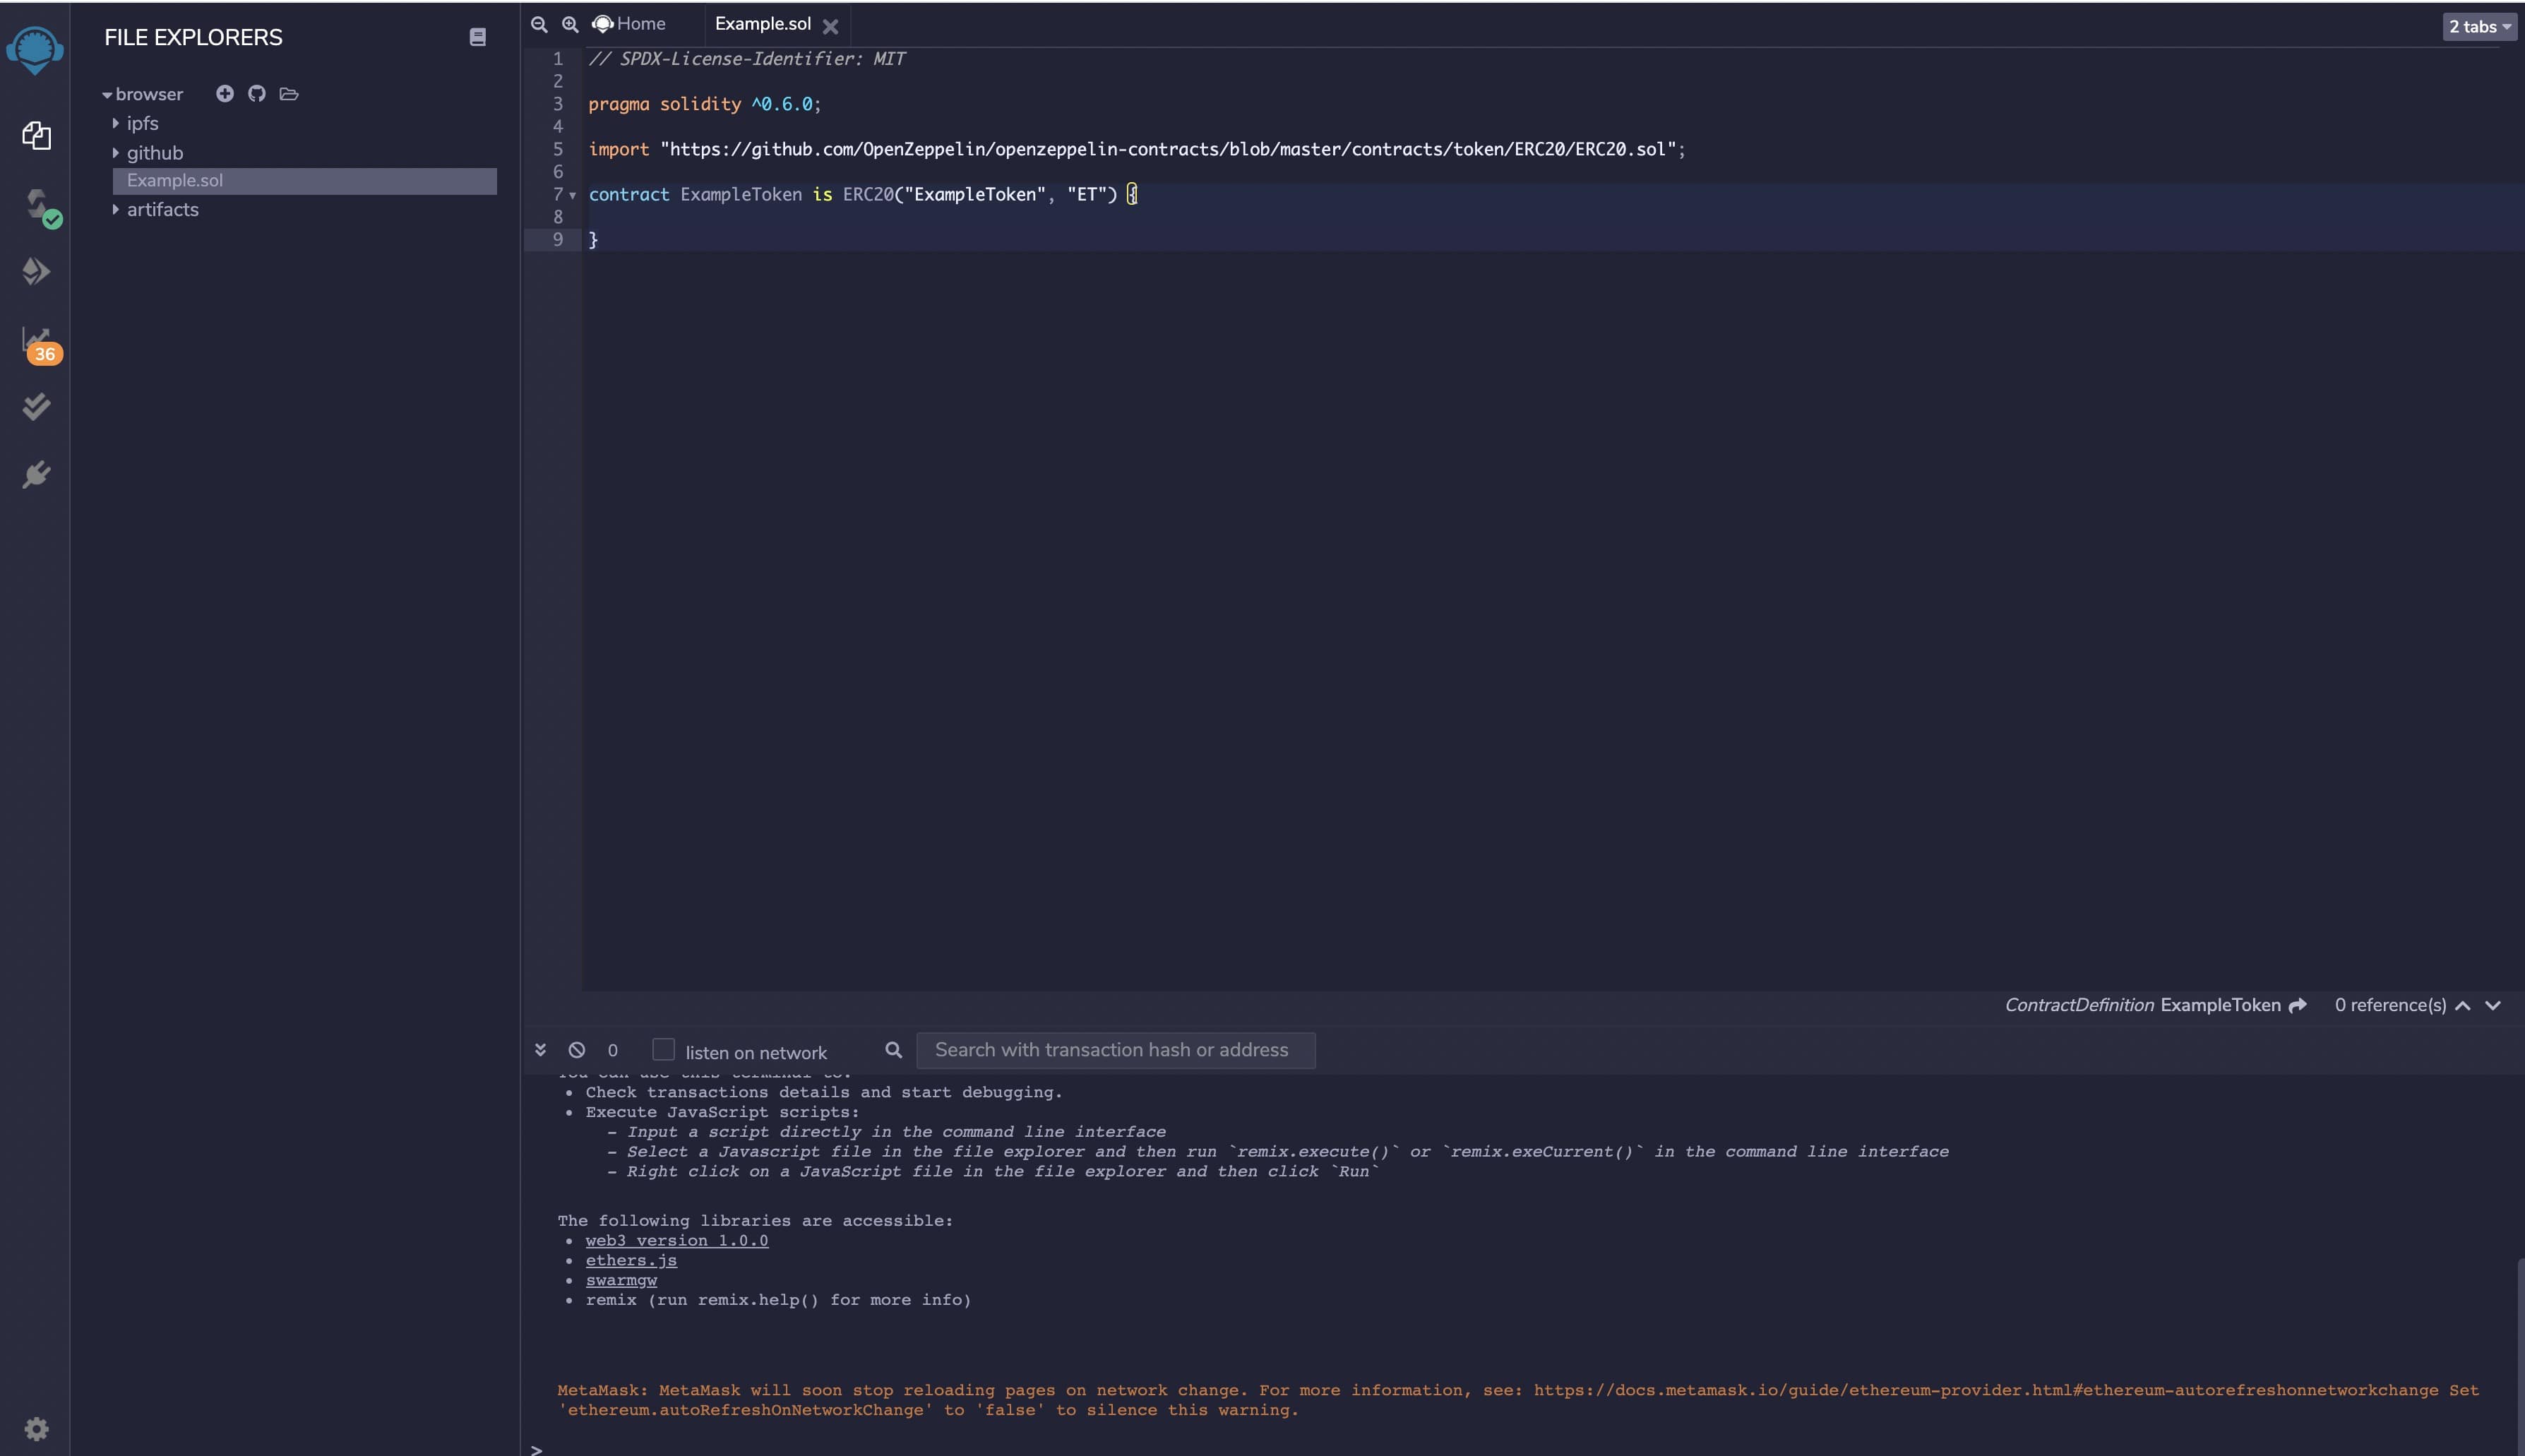
Create new file in file explorer. Edit contract info at right side.

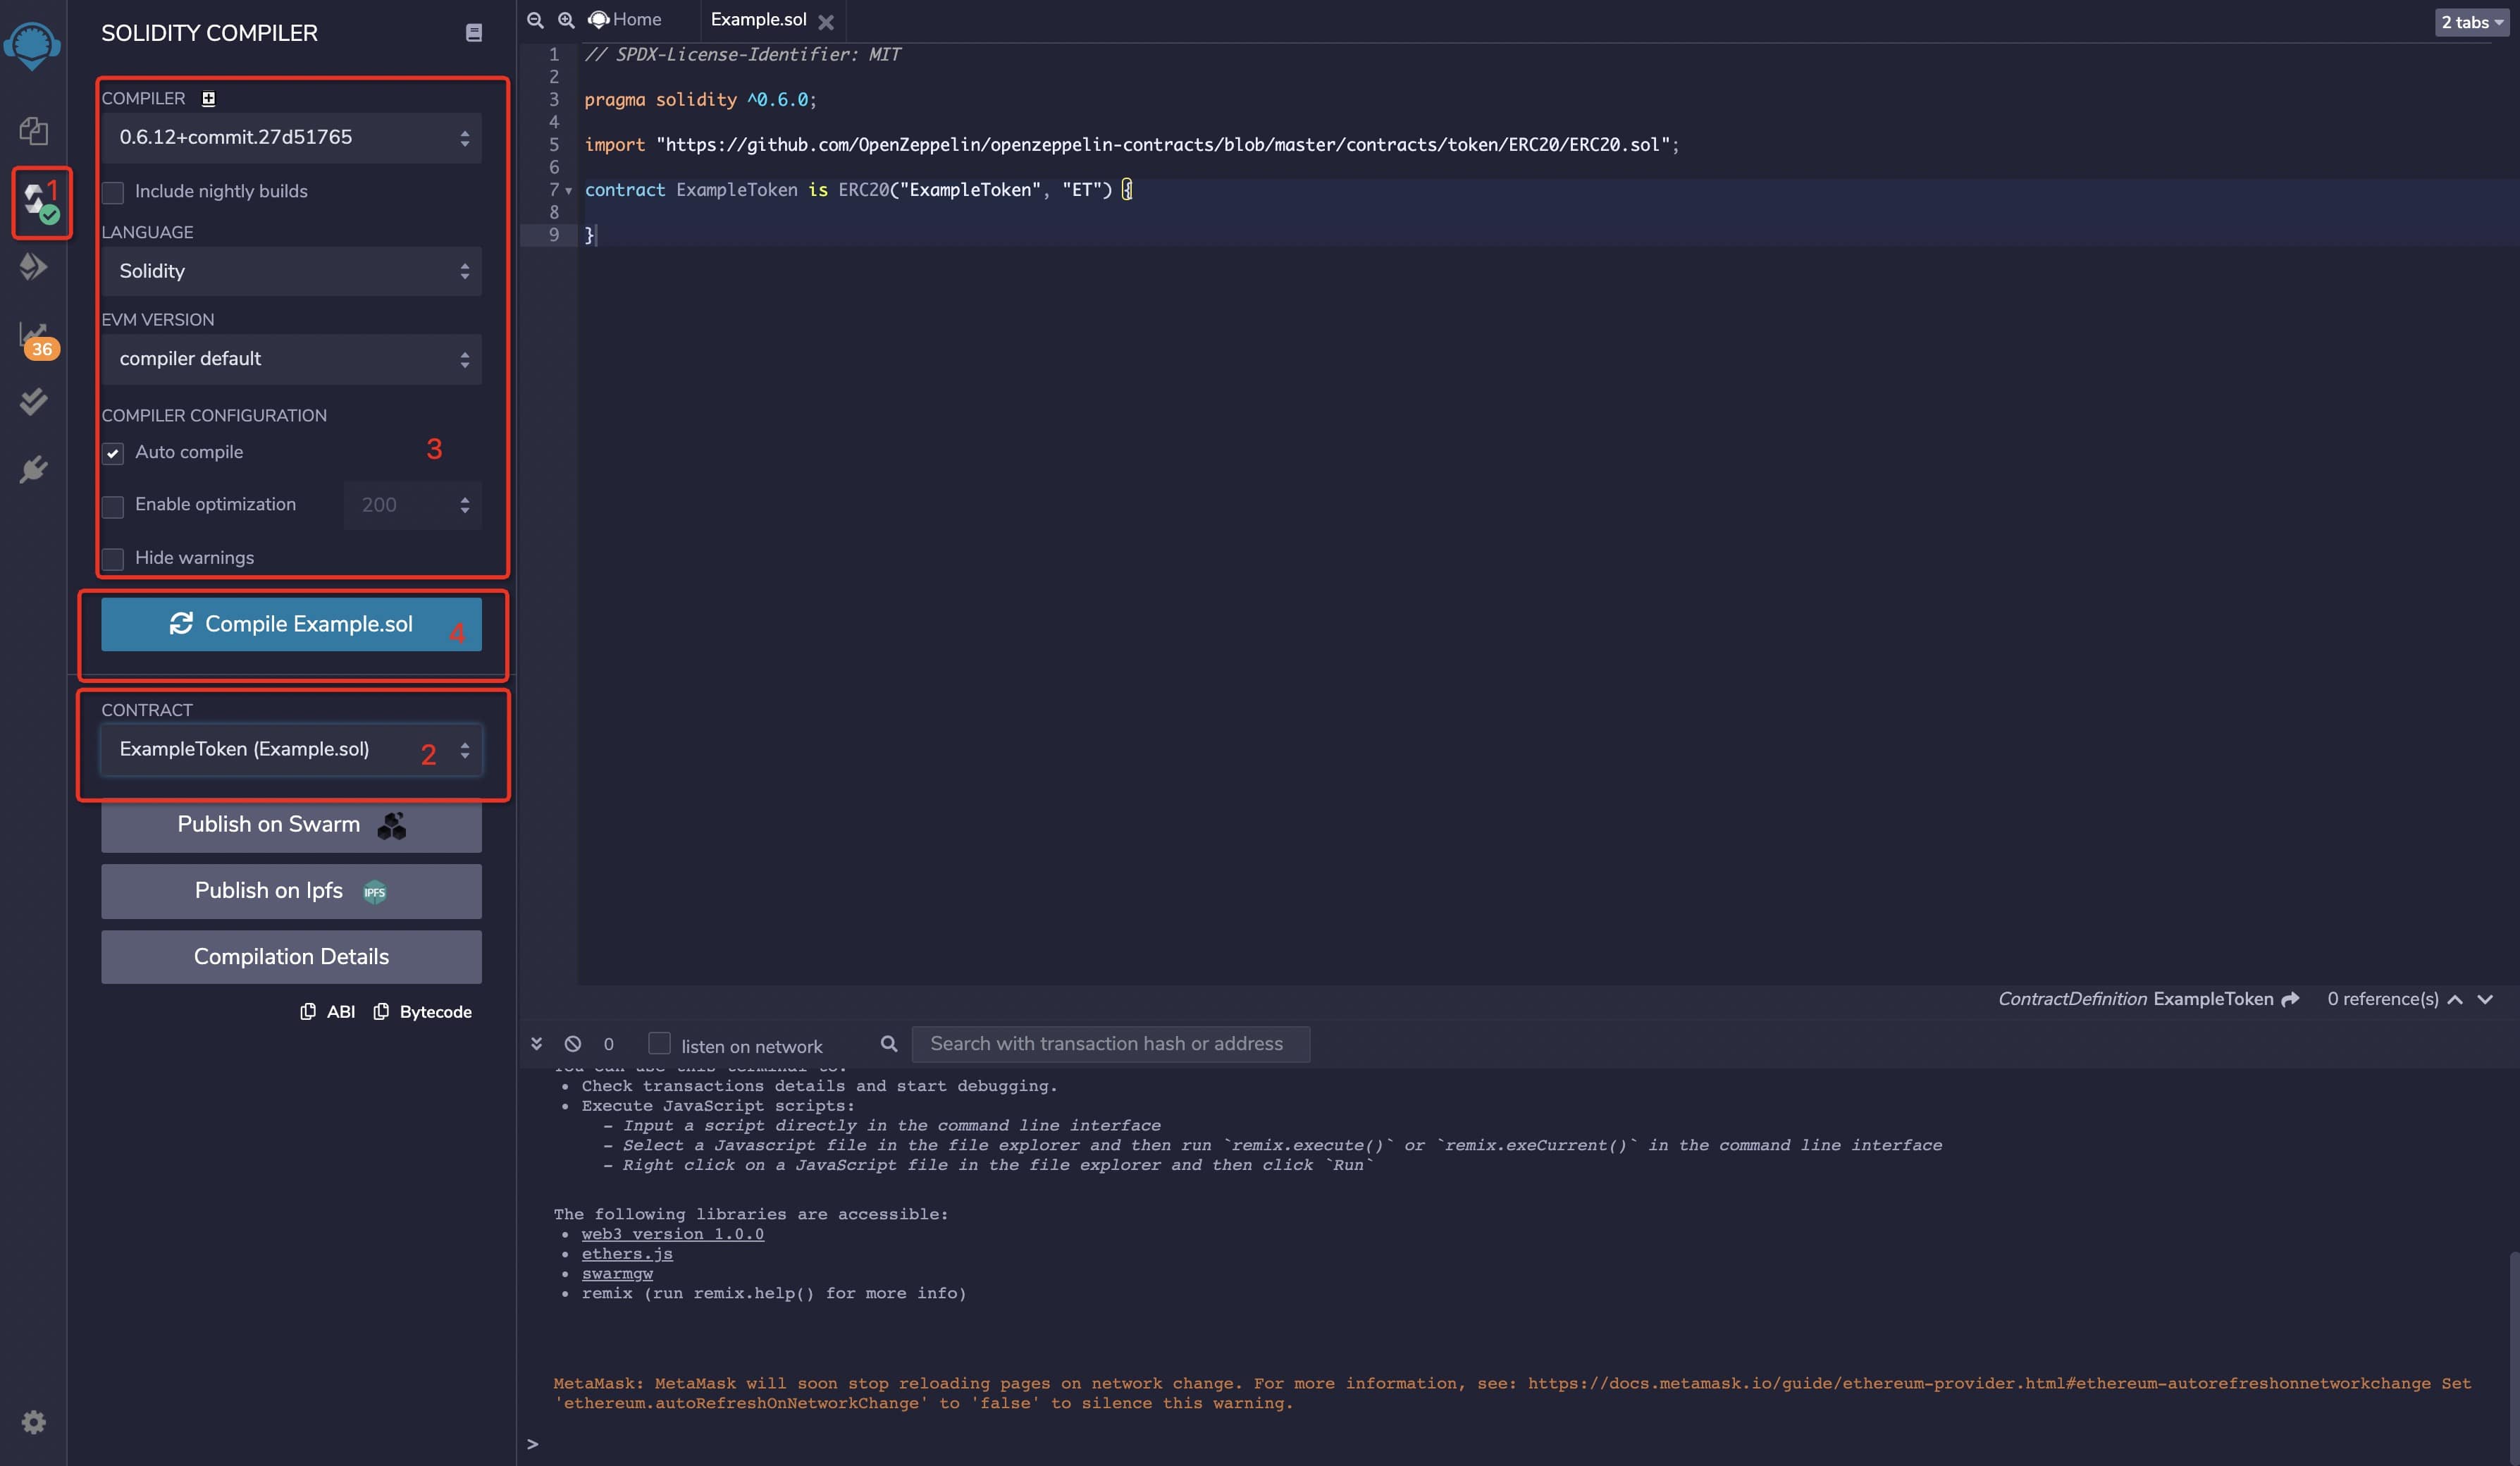
Compile contract
- Click compiler button, switch UI
- Select contract you want to compile
- Set compile flags
- Clieck compile button

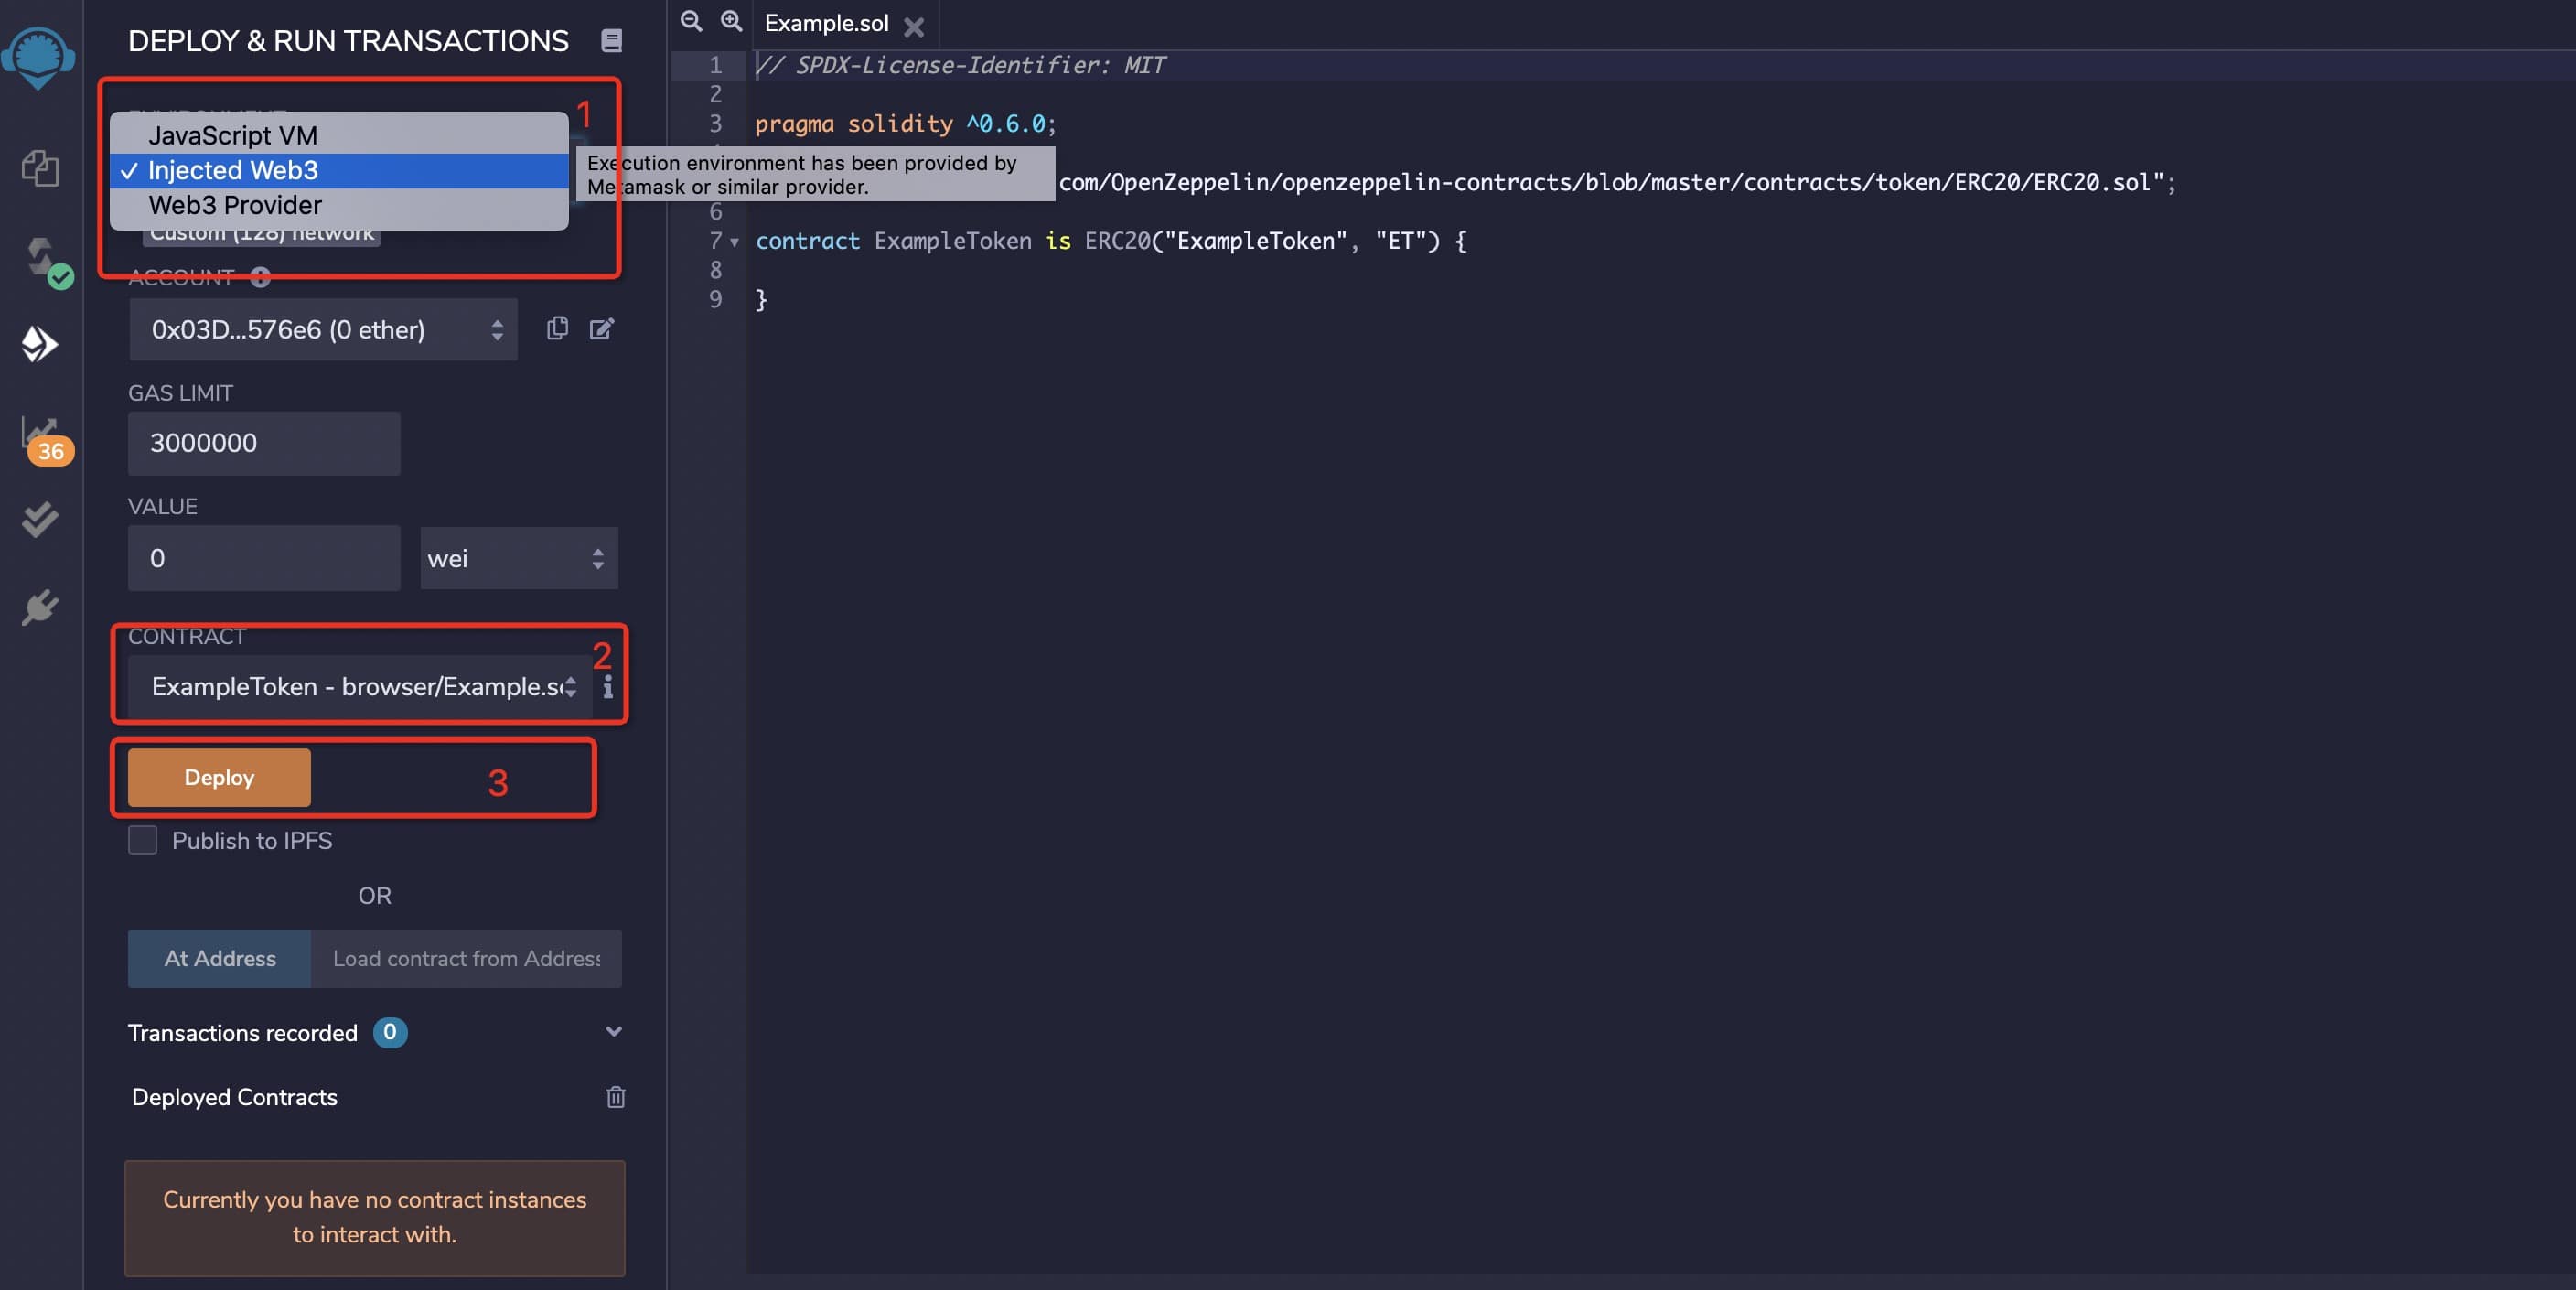
Deploy contract to blockchain via wallet such as MetaMask.
Step1. Set network info in Metamask.

Step2. Back to Remix.
- Swich environment
- Select contract
- click deploy button

And then by MetaMask the contract deployment transaction can be broadcasted to the Hepton POS.
Truffle
Use truffle to compile and deploy contract. + Install Node.js See Installing Node.js for detail.
- Install truffle
npm install -g truffle
Run truffle version after installation finished. If the command line displays a message like below, installation is successful.
Truffle v5.5.31 (core: 5.5.31)
Ganache v7.4.3
Solidity v0.5.16 (solc-js)
Node v16.17.1
Web3.js v1.7.4
- Create project
First, create folder for project.
mkdir Example
cd Example
Then, initialize project via truffle
truffle init
After initialization is complete, the following file structure is generated within the project.
|-- contracts         //folder for contracts
|-- migrations        //folder for deployment scripts
|-- test              //folder for test scripts
|-- truffle-config.js //truffle config file
- Config truffle info
const HDWalletProvider = require('@truffle/hdwallet-provider');

const fs = require('fs');
const mnemonic = fs.readFileSync(".secret").toString().trim();

module.exports = {
  networks: {
    testnet: {
      provider: () => new HDWalletProvider(mnemonic, 'https://testnet.hepton.io'),
      network_id: 404
    },
    mainnet: {
      provider: () => new HDWalletProvider(mnemonic, 'https://mainnet.hepton.io'),
      network_id: 808
    }
  },

  // Set default mocha options here, use special reporters etc.
  mocha: {
    // timeout: 100000
  },

  // Configure your compilers
  compilers: {
    solc: {
      // version: "0.8.17",    // Fetch exact version from solc-bin (default: truffle's version)
      // docker: true,        // Use "0.5.1" you've installed locally with docker (default: false)
      // settings: {          // See the solidity docs for advice about optimization and evmVersion
      //  optimizer: {
      //    enabled: false,
      //    runs: 200
      //  },
      //  evmVersion: "byzantium"
      // }
    },
  },
};
- Create contract
Put custom contracts into folder contracts and modify the deployment script script in folder migrations.
- Deploy contract
Run the deployment command.
truffle migrate --network testnet
The output as below.
2_example_migration.js
======================

   Deploying 'ExampleToken'
   ------------------------
   > transaction hash:    0x91e50594a63bc6f4c299f3f445868571678be306b835bddce6dff5c7a5ddf9dc
   > Blocks: 2            Seconds: 4
   > contract address:    0x54D2049715FC8De1361D7350de90eb05F0f6CA84
   > block number:        375304
   > block timestamp:     1608016637
   > account:             0x03D32B774295D740ffEe43b20fcC0a53acC576e6
   > balance:             878.909609236165318643
   > gas used:            1056044 (0x101d2c)
   > gas price:           20 gwei
   > value sent:          0 ETH
   > total cost:          0.02112088 ETH


   > Saving migration to chain.
   > Saving artifacts
   -------------------------------------
   > Total cost:          0.02112088 ETH


Summary
=======
> Total deployments:   1
> Final cost:          0.02112088 ETH
Finally, the contract deployment is complete.
Hardhat
Using Hardhat
What is Hardhat
Hardhat is a development environment to compile, deploy, test, and debug your smart contract.
Setting up the development environment
There are a few technical requirements before we start. Please install the following: Requirements:
Installing
There are a few technical requirements before we start. Please install the following: Requirements:
- Windows, Linux or Mac OS X
- Node.js v8.9.4 LTS or later
- Git
First, you need to create an empty project npm init --yes
Once your project is ready, you should run
npm install --save-dev hardhat
It's recommeded to install some dependencies.
npm install --save-dev @nomiclabs/hardhat-waffle ethereum-waffle chai @nomiclabs/hardhat-ethers ethers
To use your local installation of Hardhat, you need to use ``npxto run it (i.e.npx hardhat```).
Create A Project
To create your Hardhat project run npx hardhat in your project folder:
mkdir HeptonCoin
cd HeptonCoin
- Intialize your project:
npx hardhat
888 888 888 888 888
888 888 888 888 888
888 888 888 888 888
8888888888 8888b. 888d888 .d88888 88888b. 8888b. 888888
888 888 "88b 888P" d88" 888 888 "88b "88b 888
888 888 .d888888 888 888 888 888 888 .d888888 888
888 888 888 888 888 Y88b 888 888 888 888 888 Y88b.
888 888 "Y888888 888 "Y88888 888 888 "Y888888 "Y888
👷 Welcome to Hardhat v2.9.7 👷
? What do you want to do? …
Create a basic sample project
Create an advanced sample project
Create an advanced sample project that uses TypeScript
❯ Create an empty hardhat.config.js
Quit
Once this project is initialized, you'll now have a project structure with the following items:
- contracts/: Directory for Solidity contracts
- scripts/: Directory for scriptable deployment files
- test/: Directory for test files for testing your application and contracts
- hardhat-config.js: Hardhat configuration file
Create Contract
You can write your own smart contract.
Config Hardhat for HTE
- Go to hardhat.config.js
- Update the config with L2Hepton-crendentials.
/**
 * @type import('hardhat/config').HardhatUserConfig
 */
require("@nomiclabs/hardhat-waffle");
require('@nomiclabs/hardhat-ethers');
const fs = require('fs');
const mnemonic = fs.readFileSync(".secret").toString().trim();

// This is a sample Hardhat task. To learn how to create your own go to
// https://hardhat.org/guides/create-task.html
task("accounts", "Prints the list of accounts", async () => {
  const accounts = await ethers.getSigners();

  for (const account of accounts) {
    console.log(account.address);
  }
});

// You need to export an object to set up your config
// Go to https://hardhat.org/config/ to learn more

/**
 * @type import('hardhat/config').HardhatUserConfig
 */
module.exports = {
  defaultNetwork: "mainnet",
  networks: {
    localhost: {
      url: "http://127.0.0.1:8545"
    },
    hardhat: {
    },
    testnet: {
      url: "https://testnet.hepton.io",
      chainId: 404,
      gasPrice: 20000000000,
      accounts: {mnemonic: mnemonic}
    },
    mainnet: {
      url: "https://mainnet.hepton.io",
      chainId: 808,
      gasPrice: 20000000000,
      accounts: {mnemonic: mnemonic}
    }
  },
  solidity: {
  version: "0.8.17",
  settings: {
    optimizer: {
      enabled: true
    }
   }
  },
  paths: {
    sources: "./contracts",
    tests: "./test",
    cache: "./cache",
    artifacts: "./artifacts"
  },
  mocha: {
    timeout: 20000
  }
};
!!! Note It requires mnemonic to be passed in for Provider, this is the seed phrase for the account you'd like to deploy from. Create a new .secret file in root directory and enter your 12 word mnemonic seed phrase to get started. To get the seedwords from metamask wallet you can go to Metamask Settings, then from the menu choose Security and Privacy where you will see a button that says reveal seed words.
Compile Contract
To compile a Hardhat project, change to the root of the directory where the project is located and then type the following into a terminal:
npx hardhat compile
Deploying on HTE Network
Run this command in root of the project directory:
$ npx hardhat run --network testnet scripts/deploy.js
Remember your address, transaction_hash and other details provided would differ, Above is just to provide an idea of structure.
Congratulations! You have successfully deployed CRC20 Smart Contract. Now you can interact with the Smart Contract.
You can check the deployment status here: https://testnet.heptonscan.com/ or https://www.heptonscan.com/
Smart Contract Verification
note: Currently supports browser verify contracts for the time being, Plug-in verification will be supported later
How to Verify Your Contract on HeptonScan
Step 1: Deploy your contract on Hepton
Step 2: Go to Hepton Explorer or Testnet Explorer

Click on "Verify and Publish"

- Contract Address
- Compiler Type you chose in Remix or other complier
- Select Open Source License Type
Step 3: Fill in the correct information of your contract

You need to select "Yes" for Optimization, if that's enabled.
Contructor arguement is optional. If your contract do have one, you can go to this page to generate the encoded ABI json.
!!! info
Click on "Verify and Publish" to finish this process. Now you are all set!